
Screencast-o-Matic
How would you like to make a video and upload it to a You
Tube channel in less than 20 minutes?
I am going guide you through the video
production using a chemistry lesson from a
SMART Notebook file, and software from Screen Cast–O-Matic to create,
publish and upload a digital resource.
 The Screen Cast-O-Matic software
combines a very basic recording platform, some simple editing features and
options to save the movie to your own data files or upload directly to a You
Tube channel. Screen Cast-O-Matic can be used with any SMART Notebook,
PowerPoint or Key Note presentation. The
screen capture software allows for the control of the capture screen size,
which makes it easy to work within smaller windows on a larger platform.
The Screen Cast-O-Matic software
combines a very basic recording platform, some simple editing features and
options to save the movie to your own data files or upload directly to a You
Tube channel. Screen Cast-O-Matic can be used with any SMART Notebook,
PowerPoint or Key Note presentation. The
screen capture software allows for the control of the capture screen size,
which makes it easy to work within smaller windows on a larger platform.
The software can be downloaded for free
at
screencast-o-matic.com.The free version has a
fifteen minute recording limit. The full
version can be purchased for $12.99 and allows for longer recording time and
additional editing tools.
This example is making a
video about how to write electron configurations in chemistry. This lesson uses a
pre-made SMART Notebook lesson. I prefer
to pre-make my lessons with animations of the steps fading in on mouse
clicks. I personally do not like the way
I write with the mouse or using a wireless pad.
But, this is entirely up to you and what the objectives of your lessons
are.
First I open the
platform for my lesson. In this case my SMARTnotebook
software.
 Next locate and activate
Screencast-o-matic (SOM) from the dock on my desktop.
Next locate and activate
Screencast-o-matic (SOM) from the dock on my desktop. 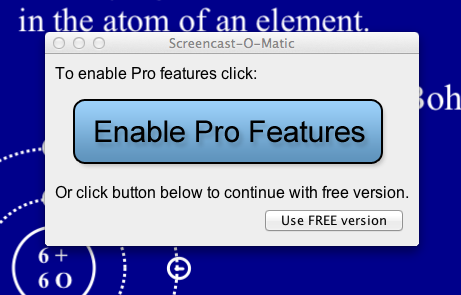 When the SOM software opens it asks if you
would like to enable the pro features purchase or use the free version. The
free version is fine for anything under fifteen minutes.
When the SOM software opens it asks if you
would like to enable the pro features purchase or use the free version. The
free version is fine for anything under fifteen minutes.
Remember to keep your videos short.

The SOM will open a frame with a control center on the bottom. This frame can be adjusted to capture as much of your desktop, SMART Notebook, PowerPoint or Key Note as you are going to use in the video.
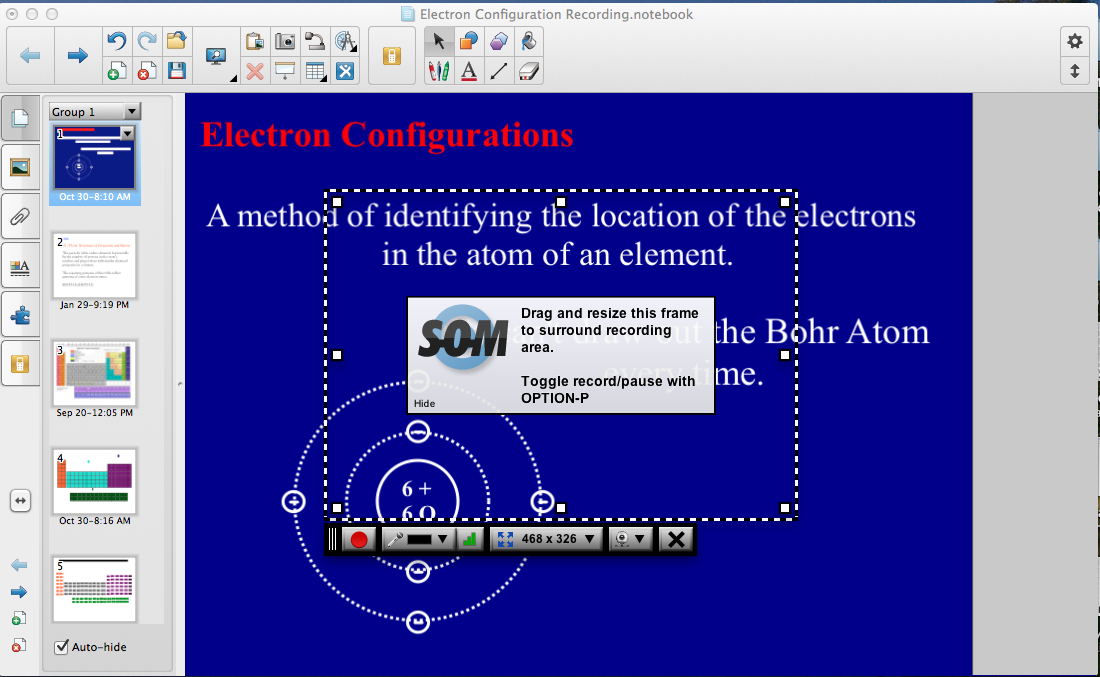 The original frame size may not fit the portion of your
screen that will be recorded. The SOM
software will prompt you to manipulate the frame to the size needed for your
recording.
The original frame size may not fit the portion of your
screen that will be recorded. The SOM
software will prompt you to manipulate the frame to the size needed for your
recording. 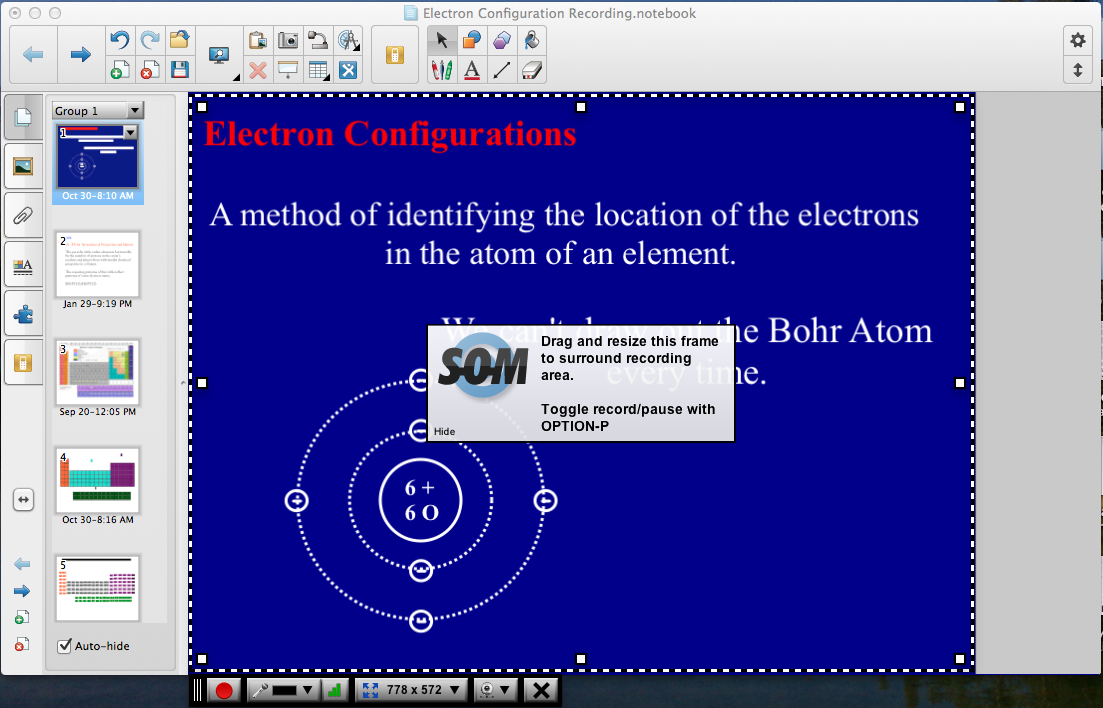 Drag and re-size the frame to the appropriate size for your
recording. I capture only the workspace
for the lesson. I leave the tools
outside the frame. I still can use those
tools without them being seen in the recording.
Drag and re-size the frame to the appropriate size for your
recording. I capture only the workspace
for the lesson. I leave the tools
outside the frame. I still can use those
tools without them being seen in the recording.
The control panel for the SOM software
is at the bottom of the recording frame.

The
red circle is the record/pause control.
Make sure the mic and sound check is working during the recording. There is nothing worse than getting the
perfect take and your mic is not on.

You
can set up an external camera if you would like to add your image to the
recording. The X on the right will close
the recording window.
When
you begin recording the record button changes to a pause button. Use this to
provide time to catch your breath, gather your thoughts, change slides, etc….
The
recording time will also appear. Be
aware of the fifteen minute time frame as you record your video.
Once
you begin recording, whatever you do on the software platform will be
recorded. Your voice, writing, typing,
manipulating objects, changing slides, animations, slide transitions, will all
be recorded by the SOM software.


At the
end of the recording press DONE.
The SOM
upload screen will appear.

You can preview your video
at this point.

There are three options for
upload. Publish to
Screencast-O-Matic, publish to You Tube
or publish to a video file. Always publish to a video file. This allows you to have a file available to
use outside of SOM or Your Tube.
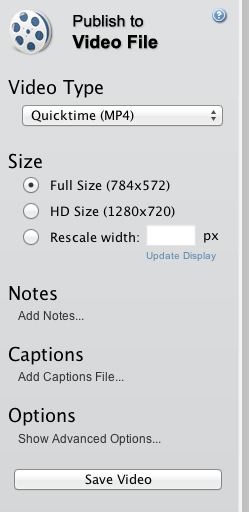 When you publish to a video
file you have the opportunity to add notes to the video or add captions and
some other basic options.
When you publish to a video
file you have the opportunity to add notes to the video or add captions and
some other basic options.
Save
at Full Size. HD is nice for your
computer, but HD affects download speeds and students may not have great
bandwidth at home.
The
MP4 option is recognized by most formats on the web.
After
saving to a video file, you can then publish to SOM or You Tube. Or you can upload the file to your learning
management system of online platform.
No comments:
Post a Comment